- [Flutter] 실습 - 블로그앱2023년 11월 29일 10시 54분 33초에 업로드 된 글입니다.작성자: 핀수728x90반응형
회원가입 페이지 만들기
아래 화면을 만들어 볼 것이다.

전체 틀 잡기
먼저 화면의 큰 틀은 Scaffold, 그리고 ListView로 잡아준다.
이유는 회원가입 시 내용을 입력하기 위해 해당 영역을 클릭하면 키보드가 올라와야 하는데,
적절한 공간을 만들어주지 않으면 사용성이 떨어지기 때문이다.
(안드로이드에서는 해당 속성을 설정할 수 있는데 여기도 있지 않을까..? 리스트 뷰만이 최선일까? 생각해보자.)
Text 입력란
InputDecoration(
            hintText: "아이디를 입력해주세요",
            enabledBorder: OutlineInputBorder(
                borderRadius: BorderRadius.circular(10)
            ),
            focusedBorder: OutlineInputBorder(
                borderRadius: BorderRadius.circular(10)
            ),
            errorBorder: OutlineInputBorder(
                borderRadius: BorderRadius.circular(10)
            ),
            focusedErrorBorder: OutlineInputBorder(
                borderRadius: BorderRadius.circular(10)
            )
        )
TextFormField 위젯으로 만들어 줄것이다.
decoration 속성을 통해 스타일을 설정한다.
상황에 따른 Border 속성을 지정할 수 있다.
(지금은 일단 통일해두었지만 손보면 좋을 것이다.)
hintText로 placeholder를 설정한다.
회원가입 시 아이디, 비밀번호, 이메일 정도를 입력 받는다면
해당 TextFormField 위젯이 세개가 필요할 것이다. → 재사용 할 예정
각 필드마다 hint만 달라지고 나머지 영역은 동일하므로 재사용할 수 있도록 변경해보도록 할 것이다.
재사용 위젯 만들기
우클릭 > Refactor > Extract Flutter Widget

뽑아낸 위젯을 복사해서
lib > components 하위에 dartFile을 만들고 붙여넣어 준다.
custom_text_form_field.dart
import 'package:flutter/material.dart';

class CustomTextFormField extends StatelessWidget {

  final String hint;
  const CustomTextFormField({super.key, required this.hint}); // required : must

  @override
  Widget build(BuildContext context) {
    return Padding(
      padding: const EdgeInsets.symmetric(vertical: 5),
      child: TextFormField(
        decoration: InputDecoration(
            hintText: "${hint}", // null 안정성을 위해 문자열로
            enabledBorder: OutlineInputBorder(
                borderRadius: BorderRadius.circular(10)
            ),
            focusedBorder: OutlineInputBorder(
                borderRadius: BorderRadius.circular(10)
            ),
            errorBorder: OutlineInputBorder(
                borderRadius: BorderRadius.circular(10)
            ),
            focusedErrorBorder: OutlineInputBorder(
                borderRadius: BorderRadius.circular(10)
            )
        ),
      ),
    );
  }
}
위에서 말했듯 hint만 달라지기 때문에 hint를 인자로 받으면 된다.
required 키워드를 사용해 반드시 인자로 받을 수 있도록 하자.
CustomTextFormField(hint: "아이디를 입력하세요")그리고 필요한 곳에서 위와 같이 사용하면 된다.
버튼 만들기
ElevatedButton 위젯을 사용할 것이다.
이 버튼도 다른 곳에서 재사용할 확률이 크다. 재사용할 수 있도록 만들어주자.
import 'package:flutter/material.dart';

class CustomElevatedButton extends StatelessWidget {
  final String buttonText;
  final VoidCallback? fun;

  const CustomElevatedButton({super.key, required this.buttonText, required this.fun});

  @override
  Widget build(BuildContext context) {
    return ElevatedButton(
        style: ElevatedButton.styleFrom(
            minimumSize: Size(double.infinity, 50),
            shape: RoundedRectangleBorder(
              borderRadius: BorderRadius.circular(10),
            )
        ),
        onPressed: fun,
        child: Text("$buttonText"));
  }
}
해당 버튼을 클릭했을 때의 행위(메소드)와 해당 버튼의 텍스트를 인자로 받으면 된다.
ElevatedButton의 onPressed의 타입을 살펴보니 VoidCallback? 임을 알 수 있었다.
따라서 같은 타입으로 지정해주어 사용할 때 그 행위를 정할 수 있도록 해주었다.
Toast 띄우기 (외부 라이브러리 사용하기)
회원가입 버튼을 누르고 회원가입이 정상적으로 처리되면 로그인 페이지로 이동해야한다.
아직은 회원가입 페이지 말고 아무것도 없으니..
toast를 한번 띄워보고 싶었다.
flutter에서 toast를 사용하려면 라이브러리를 사용해야한단다.
https://pub.dev/ 여기서 라이브러리(packages) 정보를 확인할 수 있다.
fluttertoast 를 사용할 것이다. (인기순으로 정렬 시 최상단 위치)
1. pubspec.yaml
dependencies 에 선언해주면 된다.
dependencies:
  flutter:
    sdk: flutter


  # The following adds the Cupertino Icons font to your application.
  # Use with the CupertinoIcons class for iOS style icons.
  cupertino_icons: ^1.0.2
  fluttertoast: ^8.1.1
2. 사용하기
예시는 아래와 같다.
Fluttertoast.showToast(
        msg: "This is Center Short Toast",
        toastLength: Toast.LENGTH_SHORT,
        gravity: ToastGravity.CENTER,
        timeInSecForIosWeb: 1,
        backgroundColor: Colors.red,
        textColor: Colors.white,
        fontSize: 16.0
    );
나중에 해당 토스트도 공통으로 사용하고 싶어서 메소드로 빼놓았다.
전역으로 사용할 수 있게 수정해야할 것이다.
void showToast(String msg){
  Fluttertoast.showToast(msg: "$msg", toastLength: Toast.LENGTH_SHORT);
}
실제 사용은 아래와 같다.
CustomElevatedButton(
          buttonText: "회원가입",
          fun: () {showToast("회원가입");},
        )
🔫 TroubleShooting
fluttertoast 적용 이후 아이폰 애뮬레이터가 이런 에러를 뱉으며 빌드 되지 않았다.
[!] Automatically assigning platform 'iOS' with version '11.0' on target 'Runner' because no platform was specified. Please specify a platform for this target in your Podfile. See "https://guides.cocoapods.org/syntax/podfile.html#platform".
내 프로젝트의 ios 폴더에 Podfile에 들어가 2번 라인의 주석을 해제해주었다.
# Uncomment this line to define a global platform for your project
platform :ios, '11.0'
그리고 다시 빌드 실행하니 여전히 안됨…
다른 곳에서 해당 ios 폴더로 가서 pod install 하라길래 해보았다.
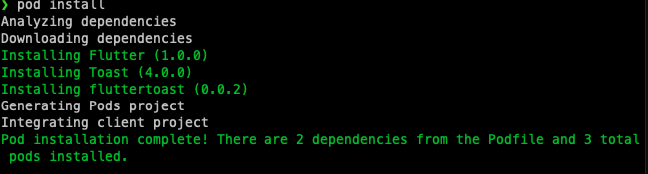
이후 다시 빌드하니 잘된다. 짝짝짝~~~
🔫 TroubleShooting2
오랜만에 다시 프로젝트를 실행시키려고 하니 새로운 에러를 뱉으며 실행되지 않았다.
Error (Xcode): SDK does not contain 'libarclite' at the path '/Applications/Xcode.app/Contents/Developer/Toolchains/XcodeDefault.xctoolchain/usr/lib/arc/libarclite_iphoneos.a'; try increasing the minimum deployment target
최소 타겟 버전을 변경하라는 뜻인데, 변경하고 아래의 구문을 추가해주었더니 정상적으로 실행되었다.
target.build_configurations.each do |config|
	config.build_settings['IPHONEOS_DEPLOYMENT_TARGET'] = '12.0'
end
Podfile 전문
# Uncomment this line to define a global platform for your project
platform :ios, '12.0'

# CocoaPods analytics sends network stats synchronously affecting flutter build latency.
ENV['COCOAPODS_DISABLE_STATS'] = 'true'

project 'Runner', {
  'Debug' => :debug,
  'Profile' => :release,
  'Release' => :release,
}

def flutter_root
  generated_xcode_build_settings_path = File.expand_path(File.join('..', 'Flutter', 'Generated.xcconfig'), __FILE__)
  unless File.exist?(generated_xcode_build_settings_path)
    raise "#{generated_xcode_build_settings_path} must exist. If you're running pod install manually, make sure flutter pub get is executed first"
  end

  File.foreach(generated_xcode_build_settings_path) do |line|
    matches = line.match(/FLUTTER_ROOT\=(.*)/)
    return matches[1].strip if matches
  end
  raise "FLUTTER_ROOT not found in #{generated_xcode_build_settings_path}. Try deleting Generated.xcconfig, then run flutter pub get"
end

require File.expand_path(File.join('packages', 'flutter_tools', 'bin', 'podhelper'), flutter_root)

flutter_ios_podfile_setup

target 'Runner' do
  use_frameworks!
  use_modular_headers!

  flutter_install_all_ios_pods File.dirname(File.realpath(__FILE__))
end

post_install do |installer|
  installer.pods_project.targets.each do |target|
    flutter_additional_ios_build_settings(target)
	target.build_configurations.each do |config|
	config.build_settings['IPHONEOS_DEPLOYMENT_TARGET'] = '12.0'
	end
  end
end
공부하며 작성된 글이라 잘못된 정보가 있을 수 있습니다.
말씀해주시면 수정하겠습니다. 감사합니다.
References
아래 글을 참고하여 작성 되었습니다.
이지업클래스 | 모두를 위한 온라인 IT CLASS
쉽게 배우고 알차게 쓰는 온라인 IT CLASS.
easyupclass.e-itwill.com
[Flutter] 토스트메세지(Toast message)만들기
토스트메세지 띄우기~~
velog.io
[flutter] toast 메세지 보이기
안드로이드에서 사용자에게 정보를 보여주기 위해 잠깐 띄우는 토스트 메세지를 플러터에서도 구현해보도록 하겠습니다. 우선은 https://pub.dev/로 가서 fluttertoast로 검색을 합니다. 그럼 검색 결
cishome.tistory.com
[!] Automatically assigning platform `iOS` with version `8.0` on target `Runner` because no platform was specified. Please speci
앱에 파이어 스토어를 적용하다 보니 이런 에러가 뜨면서 빌드가 갑자기 되지 않았다... 이게 무슨일일가..\`! Automatically assigning platform 'iOS' with version '8.0' on target 'Runner' because n
velog.io
Flutter IOS 빌드 에러 Exception: Error running pod install
Launching lib/main.dart on simon의 iPad in debug mode... lib/main.dart Automatically signing iOS for device deployment using specified development team in Xcode project: 4B7YLKL5S2 CocoaPods' output: ↳ Preparing Analyzing dependencies Inspecting targets
dev-in-gym.tistory.com
clang: error: SDK does not contain 'libarclite' at the path
After Updating to Xcode 15 I am getting the following error in my react-native app while it try to build it. clang: error: SDK does not contain 'libarclite' at the path '/Applications/Xcode.app/Con...
stackoverflow.com
728x90반응형'Flutter' 카테고리의 다른 글
[Flutter] 간단한 UI 알아보기 (0) 2023.11.28 [Flutter] 프로젝트 구조 알아보기 (0) 2023.11.27 Dart 문법 알아보기 - 3 (0) 2023.11.26 Dart 문법 알아보기 - 2 (0) 2023.11.25 Dart 문법 알아보기 - 1 (0) 2023.11.24 이전글이 없습니다.댓글